Operation Archangel was ISA Alpha Centauri's counter-invasion of Helghan in retaliation for the Helghan Empire's invasion of Vekta during the Second Extrasolar War. The objective was to quickly end the war by capturing Autarch Scolar Visari and replacing the Helghast regime with an easily controlled government. However, the ISA were underestimated by the fanatical tenacity of the Helghast and ultimately failed to accomplish their goals, costing nearly the entire loss of their invasion force in the nuclear destruction of Pyrrhus, and causing the death of Visari.
Prelude
Following the end of the conflict on Vekta in January 2358, the United Colonial Army fleet that was sent to aid Vekta had deemed the situation stabilized and withdrawn from Alpha Centauri before giving the ISA with specific orders: to restore the Helghan blockade, but not to take any other offensive action against the Helghan Empire, and to await the arrival and cooperation of a Judge Advocate General's inquisition team to investigate the matter.[2]
However, the Vektan Council were not receptive to the UCA orders under the belief that the United Colonial Nations would likely blame past decisions regarding treatment of the Helghast upon them for causing the war, thus allowing the Helghast to go unpunished for the atrocities they committed on their world. Instead, the Council defied the UCA orders and pursued for ending the war against Helghan.[2]
The Vektan Council made their main priorities to swiftly ending the war: remove the Helghast as a military threat, arresting Autarch Scolar Visari and wrestling away control of Helghan, and establishing an easily controlled regime to govern the planet, thus stopping the hatred and militarism that was the hallmark of Visari's reign and for the cause of the war.[2] The Council chose the war hero and newly promoted Colonel Jan Templar in planning the invasion of Helghan and also tasked in the recovery of the Red Dust nuclear weapons that were stolen by the Helghast during their retreat from Vekta.[3]
The operation consisted of three waves of assault with a total of three ISA battle groups.[2] The first wave was to secure a local firebase and capture the Helghast capital of Pyrrhus. The second wave, led by Templar's Battle Group Mandrake, is tasked to capture Scolar Visari and eliminate the ground opposition as well as the remaining ships and orbital defenses. The third and final wave was in charge of deploying supporting troops to assist the ISA ground forces, aid the other battle groups and escort Battle Group Mandrake in their return to Vekta with Visari as a prisoner of war to be judged for his war crimes.
Vekta's actions were in clear violation of UCN orders and caused protests from both the UCN and the Independent Colonial Strategic Alliance, which repeatedly called both sides to de-escalate the conflict.[4] However, such pleas were ignored and in November 2359 the ISA Alpha Centauri launched its invasion of Helghan.
Invasion
Upon their arrival to Helghan, the first wave of ISA cruisers rapidly obliterated the Helghast's orbital fleet and quickly established a total orbital blockade. The fleet later started to bombard Helghan's surface, but only to be met with returning fire from Helghast anti-orbital Arc Cannons.[5] The ISA were caught off guard by the Helghast's Arc weapons and were forced to temporarily delay the invasion. ISA-sponsored mercenaries were sent planetside to disable the cannons, allowing the ISA to deploy their troops to Pyrrhus while ISA ships bombard the city as cover for the ground assault.[6]
The ISA established a beachhead at Corinth River and from there made their advance on Visari Square.[7] Despite facing stiff resistance from the Helghast, which saw both sides taking large amounts of casualties, the ISA were able to capture Visari Square and Radec Academy.[8] Just as the ISA prepared to attack the Imperial Palace, Colonel Mael Radec activated a network of Arc Towers hidden beneath Pyrrhus, killing hundreds of ISA soldiers and stopping their advance on the Palace.[9]

Alpha Squad observing the destruction of Pyrrhus caused by the Red Dust warhead.
ISA weapons researcher Evelyn Batton identified the Arc weapons' power source in which Colonel Templar tasked Alpha Squad in finding the main Petrusite source of the city's defenses. Alpha Squad soon discovered the location of the Petrusite distribution grid in the Maelstra Barrens, and Templar made preparations to disable the Petrusite grid and depowering Pyrrhus's defenses.[10] Before Templar could disable the grid, Battle Group Mandrake came under a surprise counter-attack by the last remnants of the Helghast orbital fleet, led by Colonel Radec, boarding or destroying several ships in the process. Templar's flagship New Sun was heavily damaged and boarded by the Helghast led by Radec, who then killed Batton, mortally wounded Templar, and extracted the nuclear launch codes from the ship's computers to rearm the stolen ISA nuclear weapons. A dying Templar maneuvered the New Sun to crash directly into the Petrusite grid, shutting down the Helghast's Arc network.[11][3]
While Templar's actions allowed the ISA an opening to Visari Palace, Visari detonated a Red Dust nuclear warhead over Pyrrhus, killing most of the ISA forces and city's population.[12] Prior to the detonation, Radec had ordered the Helghast Army's senior officers and their forces to move out of the blast zone within ten kilometers from the Corinth River while sacrificing any Helghast troops who are unable to reach safety.[13] The remaining ISA forces fell under the command of Captain Jason Narville, who managed to avoid the nuclear explosion entirely, due to being situated outside the capital city in the Helghan desert wastes while conducting rescue operations. This small contingent then gathered any surviving troops and launched a desperate, all-out attack on Visari's Palace to capture the dictator.
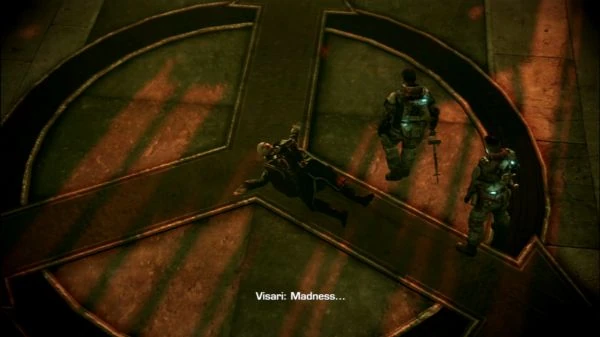
The death of Scolar Visari.
After a brutal battle between Visari's Palace Guards and the remaining ISA forces, the Helghast were driven back to the massive entrance of the Palace where they fought, and died, to the last man. Colonel Radec was mortally wounded and committed suicide for failing to protect Visari. After securing the Palace, Alpha Squad members Sergeants Tomas Sevchenko and Rico Velasquez were sent to confront Visari and finally place him under arrest. But the ISA's chances of ending the war were quickly undone when Sergeant Velasquez impulsively killed Visari out of anger.[14] Captain Narville arrived at the scene of Visari's death too late and desperately had ISA medics to resuscitate the Autarch but to no avail.[15]
Evacuation
Soon after Visari's death, the fleet of the Helghast First Army under Admiral Orlock launched a surprise attack on the ISA. The ISA High Command deemed the operation a failure and ordered all ISA personnel evacuated from Helghan. Instructed by High Command, Captain Narville led his forces in a desperate, fighting retreat through the ruined capital and across the Corinth River, and made their way to an extraction point, which was the crater created from the Red Dust nuclear warhead.[15]
The retreat was harried by relentless and overwhelming Helghast forces in which many ISA personnel were left scattered and isolated across the city. Upon reaching the Corinth River, Narville was forced to thin his forces to secure the crater before a fleet of twelve Helghast battleships engaged the three remaining evacuation ships. The ISA cruisers soon came under heavy fire from Helghast MAWLRs. Only the ISA ship Arcturus safely departed from the planet while the ships Compulsion and Dauntless were shot down. The surviving ships were then forced to leave Helghan, abandoning many ISA soldiers including Narville and members of Alpha Squad behind, stranding them at the mercy of the vengeful Helghast.[16]
Aftermath
The ISA completely failed in their goals to capture Visari, nullifying any chance of ending the war. The ISA invasion force were nearly decimated by the detonation of the nuclear weapon Red Dust in Pyrrhus and the subsequent Helghast counterattack destroyed much of the remaining ISA fleet during a chaotic retreat from Helghan, and consequently stranding many ISA personnel that were unable to be evacuated. In the next six months, the Vektan Colonial Government would concede to a ceasefire with the Helghast.[17]
With Scolar Visari dead, the Helghast became now more hellbent than ever on destroying the ISA and UCN for the death of their leader and the devastation of their capital. However, the loss of Visari led to a tenuous political power struggle between the factions of Admiral Orlock and Chairman Jorhan Stahl of Stahl Arms, who compete for the right as Visari's successor.
References
- ↑ 1.0 1.1 1.2 Report JL28X
- ↑ 2.0 2.1 2.2 2.3 Timeline retrieved from the official Killzone website
- ↑ 3.0 3.1 The New Sun
- ↑ Killzone 2 intro
- ↑ Orders To Arc Batteries
- ↑ Killzone: Mercenary, campaign level Lightning Strike
- ↑ Killzone 2, campaign level Corinth River
- ↑ Killzone 2, campaign level Visari Square
- ↑ Killzone 2, campaign level Salamun Bridge
- ↑ Killzone 2, campaign level Tharsis Refinery
- ↑ Killzone 2, campaign level The Cruiser
- ↑ Killzone 2, campaign level Maelstra Barrens
- ↑ Project Red Dust
- ↑ Killzone 2, campaign level Visari Palace
- ↑ 15.0 15.1 Killzone 3, campaign level Evacuation Orders
- ↑ Killzone 3, campaign level Pyrrhus Evac
- ↑ Killzone 3, campaign level Six Months On